 I made the card base out of tangerine tango cardstock and then stamped the En Francais stamp onto the rose red cardstock with versamark ink. I matted everything with more white cardstock and then tied a piece of the tangerine tango ribbon around the bottom.
The card looked ok but I thought it needed a little something extra on it, so I coloured in the top of the flowers with my two way glue pen and sprinkled some dazzling diamonds over the top to give it a little bling.
This stamp set is so easy and quick to use as there is no colouring in and it takes up just about the whole card front.
I will have an easter card to share with you next time.
Keep on creating.
xx Nicky
Supplies:
Stamps: Inspired by Nature, En Francais
Ink: Tangerine Tango, Rose Red, Always Artichoke, Versamark
Card: Whisper White, Tangerine Tango, Rose Red
Accessories: Tangerine Tango ribbon, two way glue pen, dazzling diamonds
Thursday, March 25, 2010
Inspired by Nature

Tuesday, March 23, 2010
Hello

I made a z-fold card in pink passion and used the two different types of dsp to cover both the first and last sections of the card. I then mounted the scallop circle on the front. This is a picture taken looking down on the card, so you can see why it is called a "z-fold" card.

As you are probably aware the summer mini finishes on 31 March, so if you are thinking of ordering anything from the catalogue, please call me as soon as possible to place an order.
Keep on creating.
xx Nicky
Supplies:
Stamp Sets: Happy Moments, Hello Again
Saturday, March 20, 2010
Happy Grandparents Day
To celebrate Grandparents Day Jess' school had a special assembly yesterday. Earlier in the week her teacher asked her to draw a picture of her Grandad, which would be put in the hall on display with all the other pictures from her class. This is her picture.

She sat at the table for ages drawing and then brought it in to show me. With a slightly confused look on her face she said to me "Grandad does wear glasses doesn't he Mummy". I had a bit of a giggle and reassured her that yes he does, which immediately put a huge smile back on her face.
The assembly was great with heaps of people coming to support the day. I was so proud when Jess received a special teacher's award for her artwork and then the Student of the Week award for her class.
I will leave you with this beautiful picture of the kids I took this week and we all hope you have a great Grandparents Day tomorrow Mum and Dad. We miss you, but will see you soon.

xx N
Wednesday, March 10, 2010
Easel card

I used the raspberry tart designer series paper and my favourite stamp set at the moment, Happy Moments, which is a set you can earn for FREE during sale-a-bration.
I stamped the flowers onto a piece of whisper white card and then stamped them again on a scrap, coloured them in with my blender pens and inkpads and cut them out and mounted them on dimensionals. I cut the circles out with my circle scissor plus and then used one of my nestabilities to make the scallop circle around the outside.
Once I had made the main part of the card I set about making the base to place it on. This is what it looks like when it is opened up. I used one of the kiwi kiss corduroy buttons from the spring mini catalogue to hold the card open.
 This is a side view of the card.

The beauty of these cards is they look amazing when they are sitting open, but fold down flat to be posted. I think I may have found the card design for my mother's day cards this year.
If you would like to know how to make an easel card, please email me and I will happily share the measurements with you.
Keep on creating
xx Nicky
Supplies:
Stamp set: Happy Moments
Cardstock: Kiwi kiss, whisper white, real red
Designer Series Paper: Raspberry Tart
Ink: Black stazon, cameo coral, kiwi kiss, real red
Other: Circle scissor plus, nestabilities, dimensionals, kiwi kiss corduroy button
Sunday, March 7, 2010
Animal Stories
This is the card I came up with.
 I wanted to use the designer series paper that goes with this stamp set, Tall Tales, and after picking the patterns I wanted to use, I chose some cardstock that complemented the papers. It is a very simple card, but I was very happy with how it turned out..
I used the chocolate chip 1" double stitched grosgrain ribbon to cover the join in the two patterned papers and then mounted the papers onto some chocolate chip card, before placing on a so saffron card base. I punched out a so saffron scallop circle and cut a 1 1/2" circle out of whisper white card with my circle scissor plus. I stamped the elephant in chocolate chip ink on a scrap piece of card, cut it out and mounted it on the card with dimensionals.
It looked a little plain, so I stamped the "wish big" sentiment from the Short & Sweet stamp set and punched it out with the word window punch, and my card was done.
Leave me a comment and let me know what you think.
Keep on creating.
xx Nicky
Supplies:
Stamp set: Animal Stories
Card: So Saffron, Chocolate Chip, Whisper White
Designer Series Paper: Tall Tales
Ink: Chocolate chip
Other: Scallop circle and word window punches, circle scissor plus, chocolate chip 1" double stitched grosgrain ribbon, dimensionals
Saturday, February 27, 2010
Happy Birthday
Today I have the birthday version of the card I showed you in my last post.
 The card layout and colour scheme is the same as the previous post, the only things I changed were the width of the strip of dsp across the middle, the sentiment at the top and bottom and the image in the centre of the card.
For this card I used the Happy Moments stamp set, which is one of the FREE sale-a-bration stamp sets this year. While I love all the sale-a- bration stamp sets, this one has to be my favourite. It has four images and three sentiments, with three of the images being perfect for colouring in – which I am really enjoying at the moment.
I stamped the image in black stazon ink and then coloured it with my blender pen and ink pads. I really like the effect you get when you use a blender pen to colour in as it provides a far softer colour and I find it is really easy to control where the colour goes.
If you would like to own this set (or any of the other Sale-A-Bration sets) all you have to do is purchase $100 of product from me before the end of March, and you are able to pick one of the exclusive stamp sets for FREE.
Til next time.
Keep on creating.
xx Nicky
Supplies:
Stamp set: A happy heart
Card: Close to cocoa, riding hood red, very vanilla
Designer Series Paper: Candy Lane
Ink: Black stazon, riding hood red, close to cocoa, pink pirouette, pumpkin pie
Other: Dimensionals, mat pack and paper piercer
Thursday, February 25, 2010
Happy Valentine's Day

I stamped the large heart with riding hood red onto a scrap of card and then cut it out and mounted it on the card with dimensionals. Lastly I decided that the sentiment at the bottom needed something a little extra, so I restamped the image on a scrap of card with riding hood red and punched the circle out and mounted it on dimensionals too.
I hope you like this card, and I will have the birthday version to show you in a couple of days.
Keep on creating.
xx Nicky
Supplies:
Stamp set: A happy heart
Card: Close to cocoa, riding hood red, very vanilla
Designer Series Paper: Candy Lane
Ink: Riding hood red, close to cocoa
Other: Dimensionals, mat pack and paper piercer, ½” circle punch
Sunday, February 21, 2010
Another baby card
I started off by choosing the pram out of Fun and Fast Notes and then decided to use the Bella Rose paper. It all fell into place after that - well until I went to get my Jumbo Outline Alphabet to put Emily's name on the bottom of the card - and realised Kylie had borrowed it, so I went with option two - which was white ribbon tied in a bow.
 I did a lot of layering with chocolate chip card (my favourite). I stamped the pram onto some dsp and then cut it out and paper pieced it. This is a shot of all the layers on the pram.
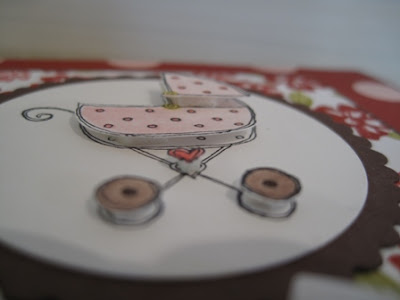 I was really pleased with it once it was finished and Kylie liked it too.
If you would like to order this stamp set, or any other Stampin' Up! products, please email me.
Keep on Creating.
xx Nicky
Supplies :
Stamps: Fun & Fast Notes
Cardstock: Pirouette Pink, Chocolate Chip, Whisper White,
DSP: Bella Rose
Ink: Black stazon, Chocolate Chip, Riding Hood Red
Other: Blender pen, dimensionals, white grosgrain and pirouette pink ribbon,
scallop border punch, circle scissor
Thursday, February 4, 2010
Sale-A-Bration is here
1. Place an order. For every order over $100.00 you can choose one free Sale-A Bration stamp set of your choice. The more you spend, the more free stamp sets you could get.
2. Host a workshop. If your workshop sales are over $600 you earn one free Sale-A-Bration stamp set of your choice, in addition to the already generous hostess benefits.
3. Join. If you join Stampin' Up! during Sale-A-Bration you can choose a free stamp set from the Idea Book & Catalogue (valued up to $79.95).
So what are you waiting for, grab your catalogue and email me today with your order - there's no better time to buy some fabulous new stamps than now.
Keep on Creating
xx Nicky
Monday, January 11, 2010
A very belated Merry Christmas and Happy New Year
New Years was pretty quiet. We went into Darling Harbour and watched the 9pm fireworks with the kids. It was really fun because we haven't been in Sydney for New Years for ages and they had never seen the fireworks before, so they really enjoyed it. We recorded the midnight ones and they watched them the following morning.
I haven't had a chance to get on the computer much over the last 3 weeks, what with David being on holiday and having both kids around, the day seems to fly by.
We are heading off to Queensland today for a couple of weeks, so I will not be back blogging until the start of February. Please be sure to check in with me then, because I have lots of really cool stuff to show you.
Keep on creating.
xx Nicky
Sunday, December 20, 2009
School teacher card
I knew I wanted to use the Holiday Lineup stamp set (which was kindly leant to me by my good friend Sandra). I really couldn't decide what image I liked the best, and since it was to be from the whole class, I thought a large card would be good. After a little deliberation I decided to make a tri-fold card out of a full sheet of A4 cardstock. The reason behind this was that I could use all three images and we could write our message on the inside middle panel and all the kids could write their names on the two panels on either side.
This is what the card ended up looking like.
 I was really pleased with how it turned out. I used the polka dot background stamp with versamark ink all over the front and coloured the images with a blender pen and my inkpads. I mounted the images on different sides of the card, this is what it looked like when opening it.
I was initially going to make a gift card wallet to go with the card, but was really happy with the card and realised there was more than enough room on the middle panel inside to fit a gift card. To place the gift card inside, I used the slit punch to make slits on three sides at the bottom, and then slid the gift card inside them. Unfortunately I didn't take a photo of the inside when it was all done!
It was gratefully received by Mrs M and I am sure that she will enjoy some retail therapy during the school holidays.
Next time ... mmm not sure yet, but hopefully will have time to post something else this week, before Christmas is upon us.
Keep on creating.
xx Nicky
Supplies:
Stamps: Holiday Lineup, Polkadot background
Cardstock: Riding Hood Red, Kiwi Kiss, Whisper White
Ink: Black stazon, Versmark, Riding Hood Red, Kiwi Kiss, Blush Blossom, Close to Cocoa, Chocolate Chip, Creamy Caramel, Pumpkin Pie
Tuesday, December 15, 2009
A very long time between posts
With christmas fast approaching I have been forced to do quite a bit of creating over the past week, so I have plenty of new things to show you.
The first is the cute little christmas cards we made to put on the candy canes for everyone at school and daycare (57 in total!).
 They were very simple to make, but looked really effective. I just made a little 2 3/4" card and stamped the christmas tree and Merry Christmas sentiment from Season of Joy onto it. I then used the slit punch on each end of the back of the card and made a slit, which we then threaded the candy cane through (sorry I forgot to take a photo of that part). The kids then wrote their message on the inside of the front cover and voila, a cute little gift for everyone.
Here is a picture of the pile for Jessica's classmates.

Next time I will show you a card I made for Jessica's teacher using the new Holiday Lineup stamp set.
Keep on creating.
xx Nicky
Saturday, November 14, 2009
We are moving!
The card below is one I made for a friend who had to have an operation recently.
 I used my new inspired by nature stamp set. I just love this set. It is so easy to make a quick card, as it is a very large image, which takes up most of the card front. For this card I inked the stamp with my markers, then used a sponge dauber to blend where the colours joined and then stamped it. Afterwards I used tombow adhesive on the top of the flowers and applied dazzling diamonds to make it sparkle. A quick couple of punches and a sentiment and the card was ready to send.
Here's a list of the products I've used. If you would like to purchase any Stampin' Up! products, please email me.
Keep on creating.
xx Nicky
Supplies:
Stamps: inspired by nature, sincere salutations
Ink: old olive, elegant eggplant, lavender lace, so saffron
Card: elegant eggplant, so saffron, whisper white
Accessories: designer label punch, large oval punch, eyelet border punch, stampin' dimensionals
Sunday, November 8, 2009
Happy 60th Mum
This is the card I made for Mum.

It is a tri-shutter card. I used the Raspberry Tart paper as my starting point and then used all the matching colours to construct the card. I couldn't find a button that would match the colours of the card so I used the build a brad on the ribbon at the front, so everything matched. The design is CASE'd from one I saw on the very talented Marelle Taylor's blog.
We gave Mum a pandora bracelet and three charms for her birthday, so when I came across a picture of a fantasy box on the internet, I knew that it would be the perfect packaging for the present. This is what a fantasy box looks like.


If you would like to know how to make a tri-shutter card, or fantasy box, please email me.
Til next time, keep on creating.
xx Nicky
Supplies:
Card:
Thursday, November 5, 2009
Free punch anyone?
All you have to do is purchase $85 worth of items that you "need" from the following list, and either a square scallop punch or a boho blossoms punch will be yours for FREE.
The offer is valid until 14th December.
Here is an itemised list of all the qualifying products:
Simply Scrappin Kits:
Petal Party $36.95 (item 113059, pg 136)
Rock-a-bye girl $36.95 (item 112165, pg 137)
Rock-a-bye Boy $36.95 (item 112172, pg 137)
Sweet Nothings $36.95 (item 113925, pg 138)
Hoppy Memories $36.95 (item 113936, pg 138)
I wish $36.95 (item 112193, pg 137)
Ribbons:
Old Olive 5/8" grosgrain ribbon $14.95 (item 109054, pg 151)
Riding hood red 5/8" striped grosgrain ribbon $19.50 (item 111374, pg 150)
Dress Up Ribbon Originals $24.95 (item 114317, pg 150)
Valet Ribbon Originals $24.95 (item 114318, pg 150)
Pigtails Ribbon Originals $27.95 (item 114316, pg 150)
Simply Sent Kits:
Thanks x 2 Simply Sent Card Elements and More Kit $48.95 (item 116809, pg 142)
More Thoughts simply sent kit $83.95 (item 116810, pg 143)
U simply sent card elements and More Kit $48.95 (item 116808, pg 142)
No one like you Simply Sent Kit $83.95 (item 116811, pg 143)
Stamp Sets:
From the Kitchen of Stamp set $52.95 (item 115810, pg 93)
Just Jawing Stamp set $45.95 (item 115828, pg 67)
Punches and Tools:
Curly label punch bundle $65.95 (item 112966, pg 153)
Cutter Kit $33.95 (item 106958, pg 155)
Spiral Punch $20.95 (item 108341, pg 152)
Buttons:
Button Latte Designer Buttons $15.50 (item 114333, pg 151)
Button Bouquet Designer Buttons $15.50 (item 112092, pg 151)
Cardstock:
Kiwi Kiss A4 cardstock $10.50 (item 116204, pg 126)
Whisper White A4 cardstock $13.50 (item 106549, pg 127)
Real Red 12 x 12 cardstock $14.50 (item 106545, pg 128)
Bold Brights A4 assorted cardstock $14.50 (item 106560, pg 128)
Markers:
Real Red Stampin’ Write marker $5.75 (item 100052, pg 128)
Brilliant Blue Stampin’ Write Marker $5.75 (item 100057, pg 128)
Glorious Green Stampin’ Write Marker $5.75 (item 100047, pg 128)
Other Items:
Small flat cellophane bags $7.50 (item 103104, pg 130)
On Board 5 x 5 Art Journal $13.50 (item 108495, pg 147)
Please email me if you would like to order any items from this list and get your free punch!
Til next time ...
Keep on creating.
xx Nicky
Thursday, October 22, 2009
Happy Birthday Samuel
 This is the card I made for one of Jess' friends for his 6th birthday.
For the background I used the star roller wheel with versamark ink and then embossed it with clear embossing powder. I stamped Samuel's name with the big deal alphabet, cut it out and mounted it with stampin dimensionals.
It was a very simple card to make, but Sam liked it.
We are off to New Zealand on Saturday for my Mum's 60th birthday. I am really looking forward to going, as we haven't seen everyone since January. I'm not sure if I will have time to do any blog posts while I am there ... we will see.
Below is a list of the supplies I have used on the card.
Keep on creating.
xx Nicky
Supplies:
Stamps: big deal alphabet, star jumbo wheel
Ink: tempting turquoise, real red, yoyo yellow
Card: temptubg turquoise, real red, whisper white
Accessories: stampin' dimensionals
Sunday, October 18, 2009
My baby boy is 4
My baby boy Sam turned 4 years old yesterday, it doesn't seem that long ago since he was a baby. We have had 5 days of birthday celebrations for him with various friends and family members, so he has been pretty spoiled. He asked me to make him a construction cake for daycare on Wednesday, and this is the cake I made him.
 It has some matchbox construction vehicles and a whole lot of crunchie rubble all over it, with tiny teddy biscuits scattered around as workers. Everyone at daycare loved it - except the poor teachers who had to clean up the mess after the kids had eaten it!
Sam has been monster truck mad for a while now, so I decided to try and make him a monster truck birthday card. This is what I came up with ...
 I used the ute from loads of love and coloured it the same as one of his favourite trucks, Sudden Impact. I used the wheels from the truck in my by land stamp set and then added some extra bars down to them and on the tray of the ute. I stamped the sentiment and cut it out with my new star punch.
 I decorated the inside like this... 
He was so excited that I had made him a monster truck card, and I was very excited when he actually recognised that it was supposed to be Sudden Impact! Obviously my drawing skills aren't as bad as I thought they were!
I have a birthday card for one of Jess' friends to share with you next time, but until then...
Keep on creating.
xx Nicky
Supplies:
Stamps: Loads of love, by land (r), it's your birthday(r)
Ink: Black stazon, yoyo yellow, only orange, real red, basic gray
Card: Brilliant blue, only orange, whisper white
Accessories: Large star punch, stampin' dimensionals, blender pen, cuttlebug texture folder
Friday, October 2, 2009
Whimsical butterfly

This card came about because I wanted to make a girly card and have a play with my polka dot background stamp. I thought I would try and make some of my own dsp by using markers to individually colour each spot on the stamp. It took a while, but I eventually got there. I used pretty in pink, lavender lace and apricot appeal.
I coloured in the large butterfly from garden whimsy with my markers, and used a sponge dauber to blend the colours together a little. I cut the butterfly out and used stampin' dimensionals to lift it off the base card. To finish the card I just layered all the pieces together, finally placing the diamond up on stampin' dimensionals also.
I'm not sure what it is about the card that I'm not happy with, maybe it needs some ribbon, or I should have used different colours. Let me know what you think, by leaving a comment below.
Keep on creating.
xx Nicky
Supplies:
Stamps: Garden Whimsy
Ink: Pretty in pink, lavender lace, apricot appeal
Card: Whisper white, pretty in pink, lavender lace
Accessories: Stampin' dimensionals
Wednesday, September 30, 2009
New rubber

The tree stamped absolutely beautifully as it has very fine lines so is quite delicate when stamped. I coloured it in very easily with my watercolour crayons and an aqua painter. I wanted a natural look for the card, so I made a sheet of faux woodgrain to put behind the image.
Our team leader Jayne Mercer showed us the faux woodgrain technique at our recent Inklings weekend away. It is very easy to do, once you know how, and can be adapted to all sorts of colours.
If you would like to learn how to make a card like the one above, or how to do the faux woodgrain technique, why not get a group of friends together and I can come around and show you how easy it is.
Til next time...
Keep on creating.
xx Nicky
Supplies:
Stamps: lovely as a tree
Ink: black stazon, close to cocoa, more mustard, creamy caramel, whisper white
Card: very vanilla, more mustard, close to cocoa, chocolate chip
Accessories: chocolate chip marker, earth elements watercolour crayons, aqua painter, stampin' dimensionals
Thursday, September 24, 2009
Flight of the butterfly #2

I stamped the butterflies in cameo coral, and used real red to place the flowers over the bottom one, with the help of my stamp-a-majig. I then stamped the small butterfly on a scrap of paper and cut it out, then mounted it over the large butterfly with some stampin' dimensionals to lift the wings up. Lastly, I added the sentiment, again with the help of my stamp-a-majig.

If you would like to purchase any of the supplies I used to make this card, please do not hesitate to contact me.
Keep on creating.
xx Nicky
Supplies:
Stamps: Flight of the butterfly, it's your birthday
Ink: Cameo coral, real red
Card: Cameo coral, real red, whisper white
DSP: Raspberry tart
Accessories: old olive 1/4" grosgrain ribbon, stampin' dimensionals, stamp-a-ma-jig